写在前面
最近同事推荐我一个颜值与实力并存的终端工具 — iTerm2,之前一直用Mas OS 自带的终端,也能满足开发需求,但是看到这个这么炫酷还是忍不住想试一下
What is iTerm2?
iTerm2 is a replacement for Terminal and the successor to iTerm. It works on Macs with macOS 10.12 or newer. iTerm2 brings the terminal into the modern age with features you never knew you always wanted.
注意: It works on Macs with macOS 10.12 or newer
iTerm2 终极配置之旅
1. 检测环境
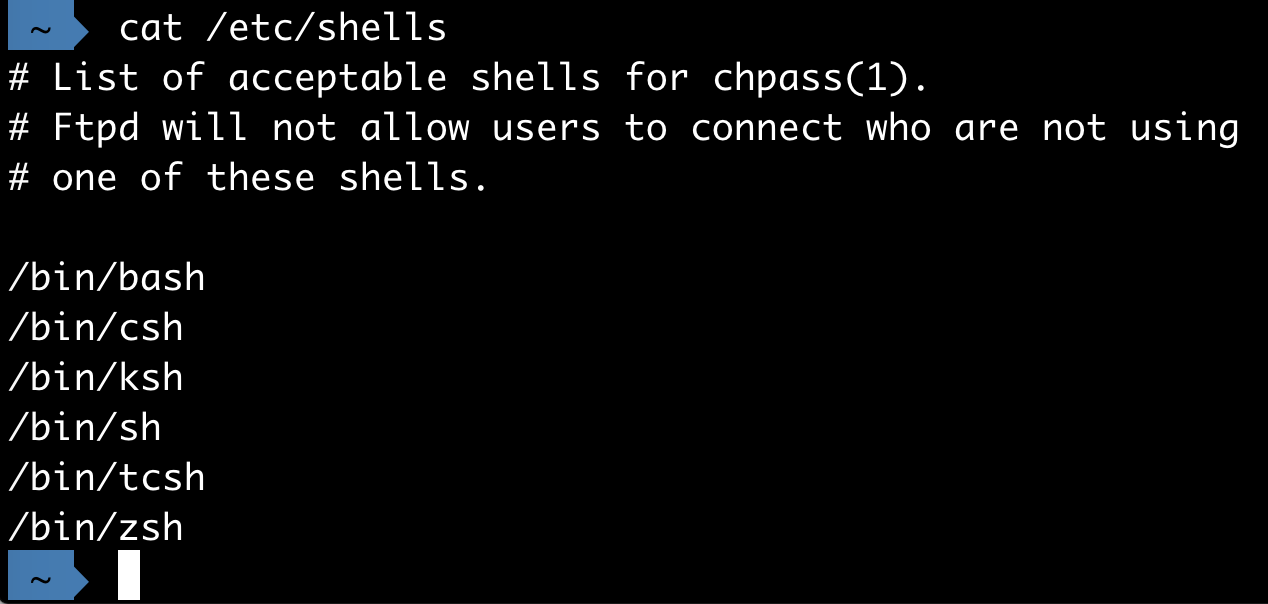
macOS自带zsh,可以通过 cat /etc/shells 检测是否有 /bin/zsh
2. 修改环境
修改默认的bash为zsh,重启Terminal或者iterm2
chsh -s /bin/zsh
检查修改结果,显示/bin/zsh即成功
echo $SHELL
切换为/bin/bash 通过命令 chsh -s /bin/bash 切换即可
3. 安装配置oh-my-zsh
安装 oh-my-zsh on github 到本地的 ~/.oh-my-zsh
1 | sh -c "$(curl -fsSL https://raw.githubusercontent.com/robbyrussell/oh-my-zsh/master/tools/install.sh)" |
人靠衣装,马靠鞍,尤其知道 iTerm2 有很多好看炫酷的 theme
agnoster 是比较常用的 zsh 主题之一 (默认主题),你可以挑选你喜欢的主题
我自己用的是 powerlevel9k 主题
1 | git clone https://github.com/bhilburn/powerlevel9k.git ~/.oh-my-zsh/custom/themes/powerlevel9k |
将主题都下载在 ~/.oh-my-zsh/custom/themes 文件夹下面
定位到 ~/.zshrc 的 ZSH_THEME行,设置 ZSH_THEME="powerlevel9k/powerlevel9k"
4. 记录我的配置之旅
4.1 同时将原bash用的各种alias都移到这里,因为原来的alias是属于bash的,zsh里需要重新alias一下命令
在~/.zshrc 任意地方配置 alias,类似这样:
1 | alias tree='open -a SourceTree .' |
4.2 首先我不希望终端前面显示计算机用户名相关名称的显示,可以这样设置隐藏显示
1 | 在`~/.zshrc`配置文件中,任意地方配置 `DEFAULT_USER=$USER` |
4.3 mac iterm2 安装 powerlevel9k 主题终端出现乱码,是因为没有安装 Meslo 字体,下面开始介绍字体安装
1 | git clone git@github.com:supermarin/powerline-fonts.git |
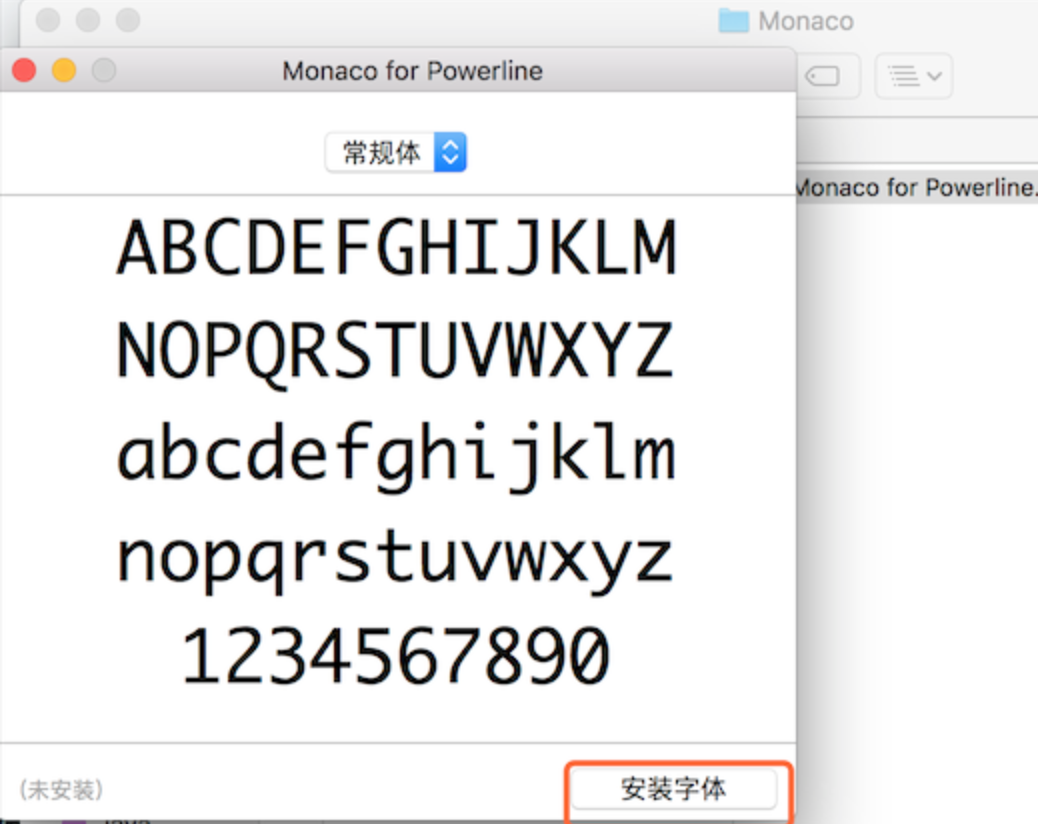
下载完成后打开文件目录,找到/Monaco/Menlo for Powerline.ttf该文件,然后双击
弹出安装字体的对话框,点击安装即可,如图所示:
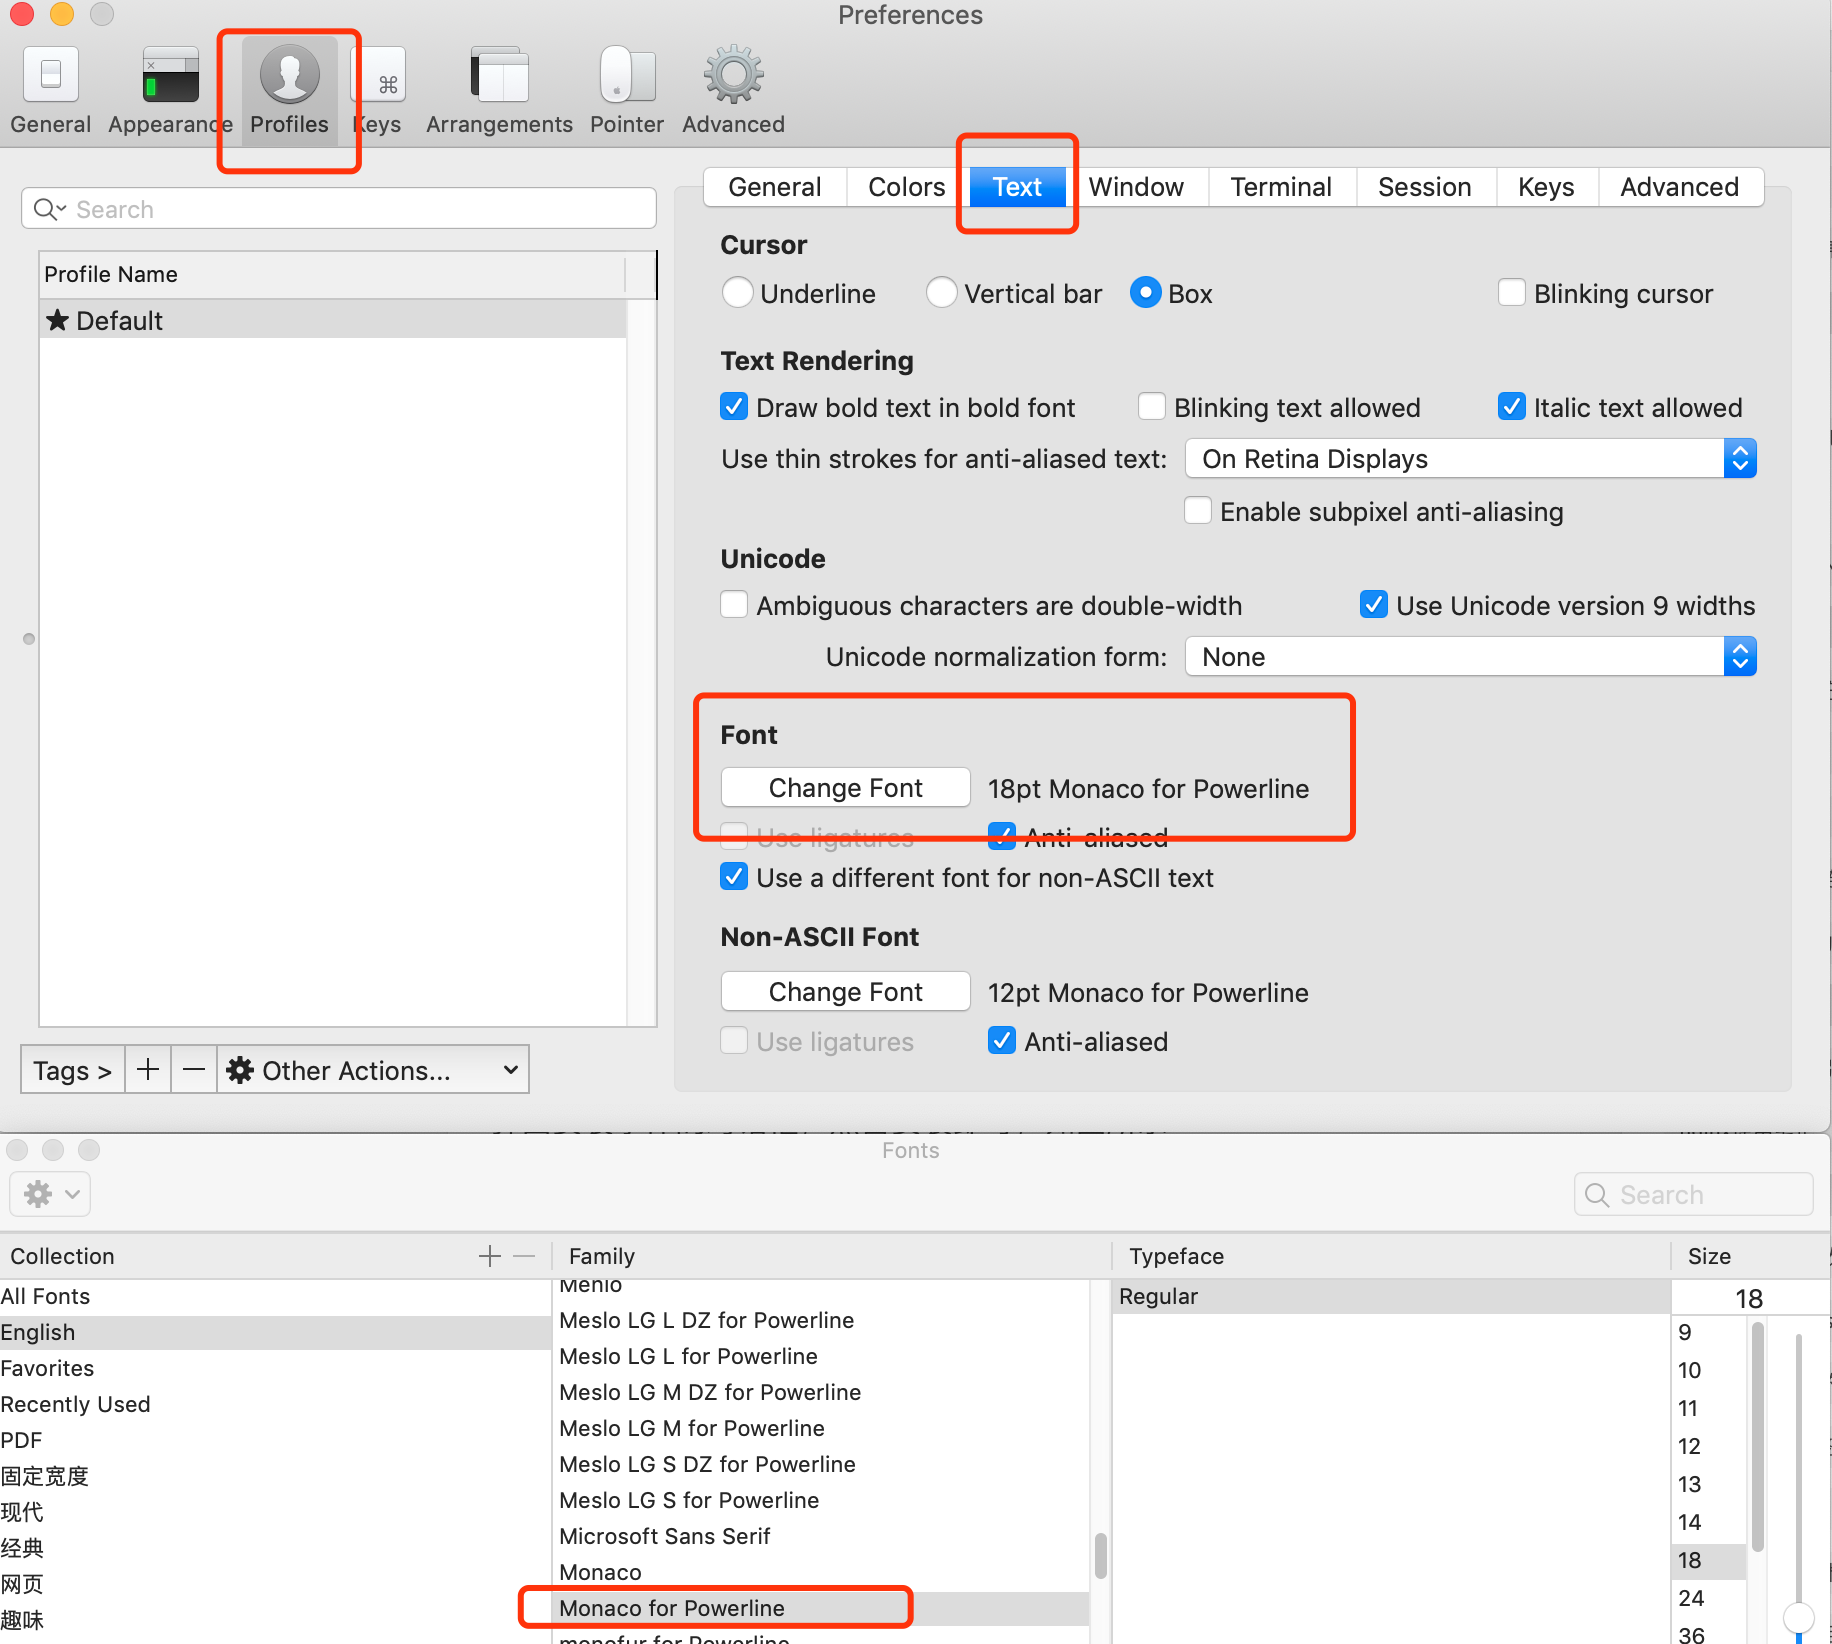
字体安装了但是并没有配置进iterm2终端,点击终端的设置preferences -> profilers -> 在点击text Tab -> change font
选择 Menlo for Powerline 字体进行设置,如图所示:
4.4 历史命令自动建议填充 zsh-autosuggestions
zsh-autosuggestions 它根据命令历史记录在您键入时建议命令
我是通过 Homebrew 安装的,如果你没有安装Homebrew 请自行安装,或者选择另外几种 zsh-autosuggestions 安装方法
1 | brew install zsh-autosuggestions |
在~/.zshrc 任意地方配置:
1 | source /usr/local/share/zsh-autosuggestions/zsh-autosuggestions.zsh |
重启 iTerm2 新窗口,如图所示,它根据命令历史记录在键入时建议命令:

4.5 指令高亮插件 zsh-syntax-highlighting
zsh-syntax-highlighting指令高亮效果作用是当用户输入正确命令时指令会绿色高亮,错误时命令红色高亮
安装:1
git clone https://github.com/zsh-users/zsh-syntax-highlighting.git ~/.oh-my-zsh/custom/plugins/zsh-syntax-highlighting
在~/.zshrc配置:
1 | plugins=(git zsh-syntax-highlighting) |
重新加载配置 source ~/.zshrc 试试指令高亮功能
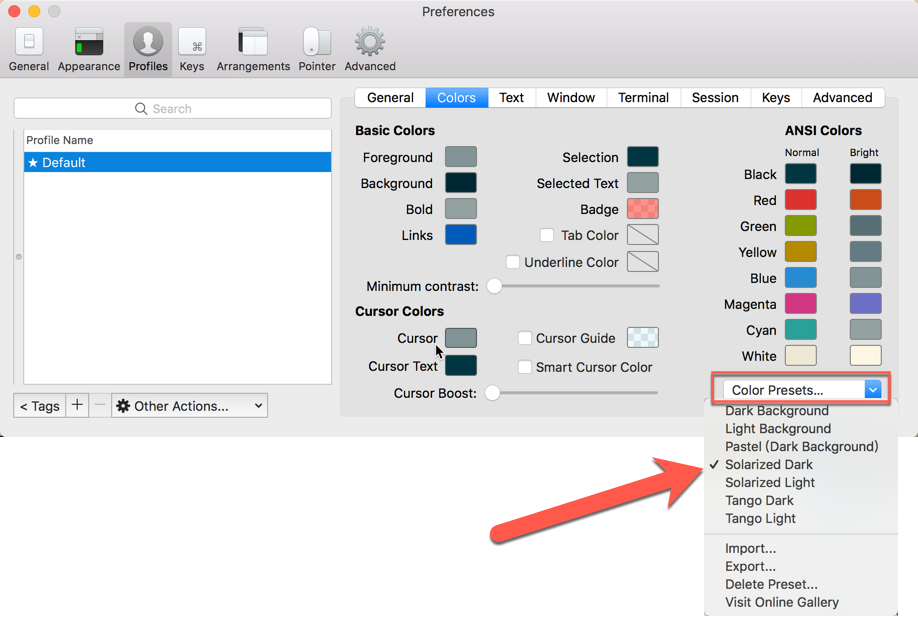
4.6 iTerm2 配色方案
下载 Solarized 配色
进入刚下载的solarized目录下:solarized/iterm2-colors-solarized
双击安装 Solarized Dark.itermcolors 和 Solarized Light.itermcolors
但是不建议这样安装,因为现在iTerm2已经内置了这两种配色。直接选择就行:
iTerm2 特殊技巧
1. 智能选中
在 iTerm2 中,双击选中,三击选中整行,四击智能选中,选中的同时也进行了复制。即:任何选中状态的字符串都被放到了系统剪切板中。
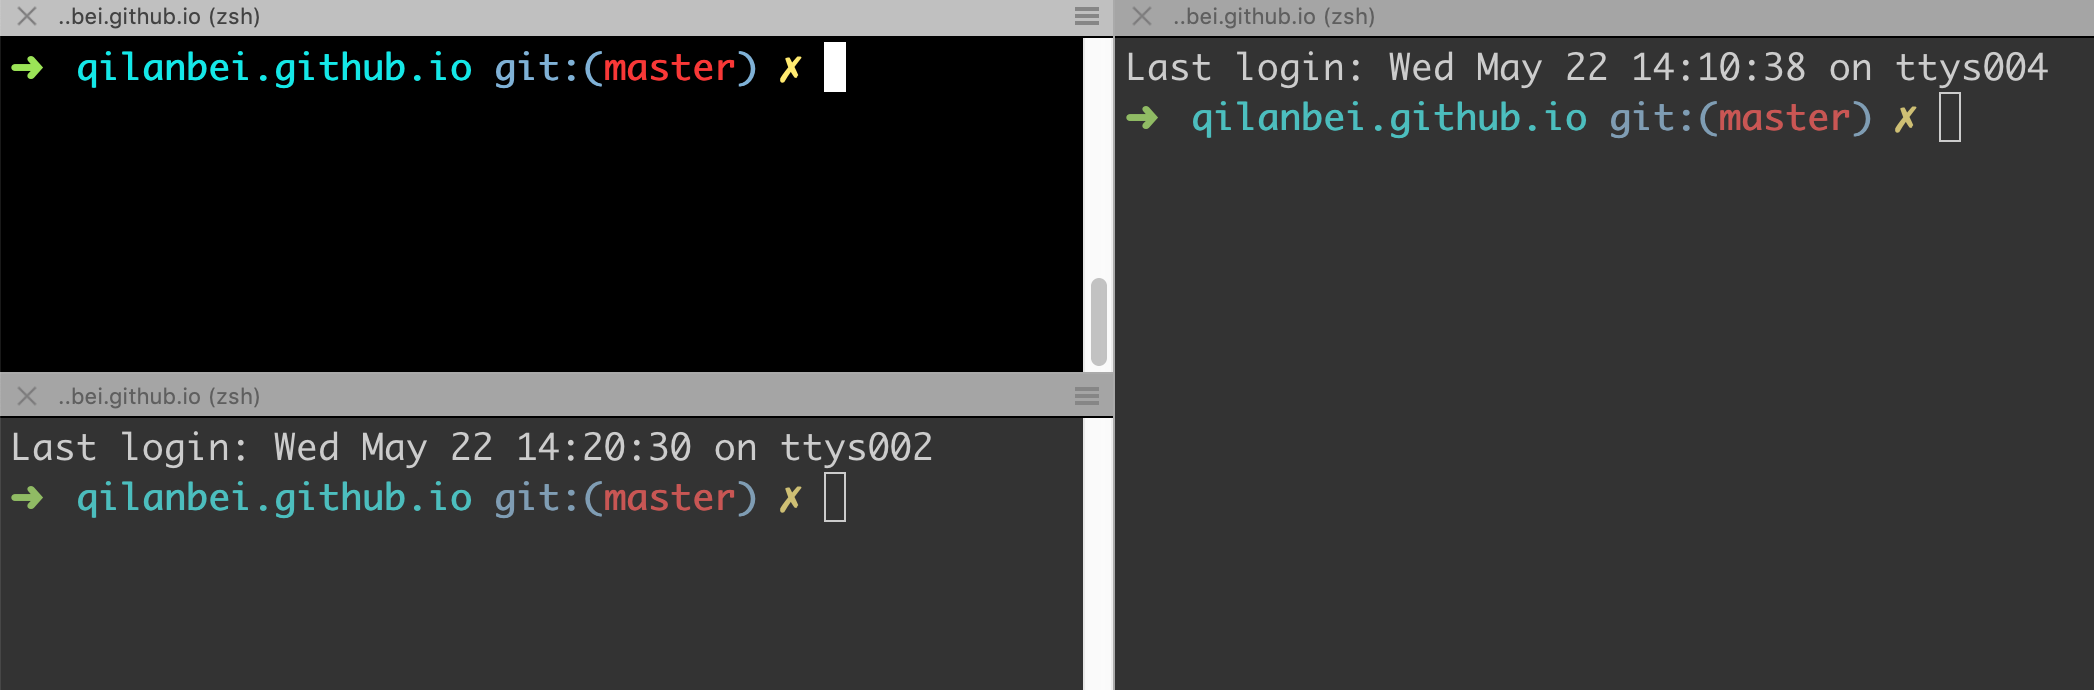
2. 强大的分屏操作
使用快捷键 cmd+d 实现左右分屏,快捷键 shift+cmd+d 实现上下分屏,效果如图:
分屏情况下,切换 Tab 中的 pane:⌘ + [ 或者 ⌘ + opt + arrow
关闭 panel:⌘ + w
新建 Tab :⌘ + t
Tab 切换:⌘ + arrow 或者 ⌘ + shift + [
窗口太多,可以使用 ⌘ + / 快速定位到光标所在位置
一屏显示所有窗口:⌘ + opt + e
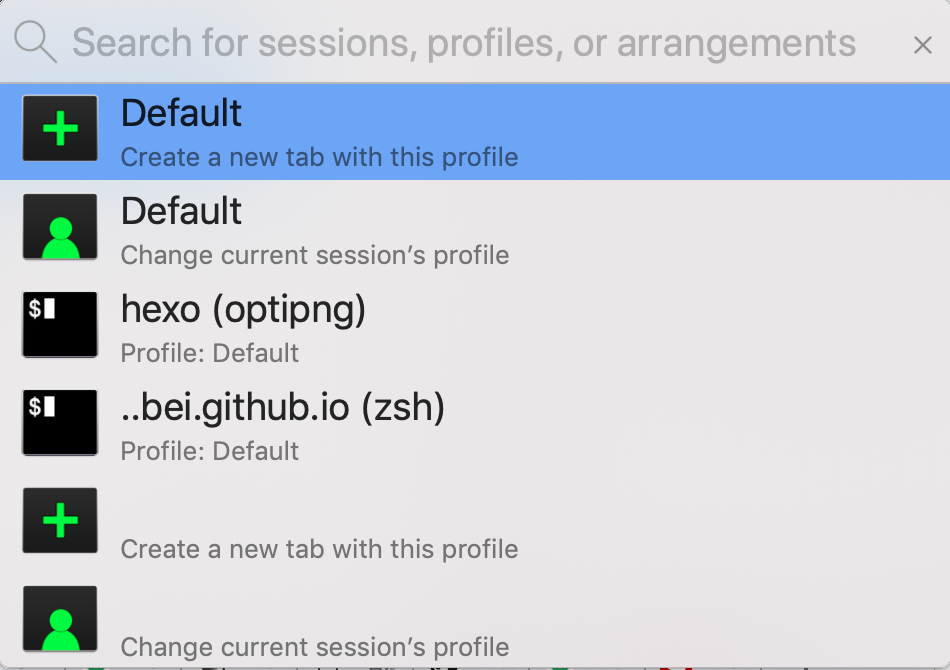
3. 快速打开profile或者切换到指定tab
快捷键 shift+cmd+o
4. 搜索历史命令 ctrl+r

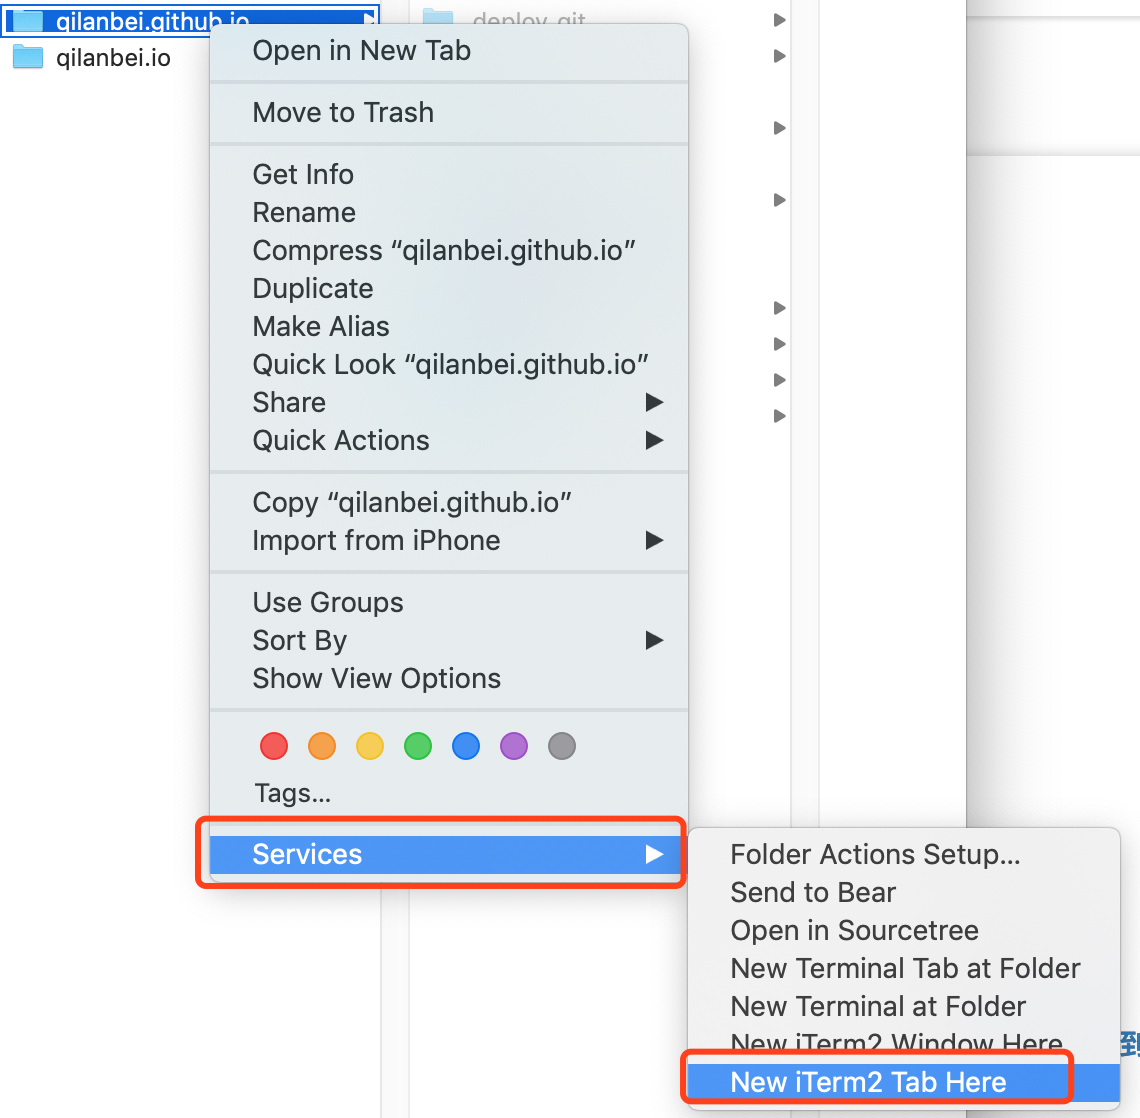
4. 在 Finder 里如何打开 iTerm2 并定位到当前目录